เริ่มต้นกับ Spring Boot part 4 สร้าง Spring Boot ให้แสดง HTML page ด้วย ThymeLeaf
สำหรับเนื้อหา Spring Boot โดยวันนี้เราจะมาเริ่มจัดการเรื่อง view กัน
เราจะเริ่มเขียนคำสั่ง HTML กันครับ โดยเราจะเขียนคำสั่งนี้ลงไปใน .html file ผ่าน thymeleaf ซึ่งเป็น library theme engine ของฝั่ง Java ช่วยให้เราสามารถสร้าง dynamic HTML เช่น load ข้อมูลจาก database ขึ้นมาแสดงใน HTML page
มาเริ่มกันเลย
สิ่งที่เราจะทำกันในวันนี้
- เพิ่ม library thymeleaf
- สร้าง template file
- เรียกใช้ template file ใน controller class
เพิ่ม library thymeleaf
เปิด project spring-clinic
แก้ไข build.gradle เพิ่ม library thymeleaf และ nekohtml เข้าไปในส่วน dependencies configuration
build.gradle
group 'com.codesanook.springclinic'
version '1.0-SNAPSHOT'


buildscript {
    repositories {
        mavenCentral()
    }
    dependencies {
        classpath("org.springframework.boot:spring-boot-gradle-plugin:1.2.7.RELEASE")
    }

}


apply plugin: 'java'
apply plugin: 'spring-boot'

sourceCompatibility = 1.7

repositories {
    mavenCentral()
}

dependencies {
    compile("org.springframework.boot:spring-boot-starter-web:1.2.7.RELEASE")
    compile("org.springframework.boot:spring-boot-starter-thymeleaf:1.2.7.RELEASE")
    compile('net.sourceforge.nekohtml:nekohtml:1.9.22')
}
อธิบายคำสั่ง
compile("org.springframework.boot:spring-boot-starter-thymeleaf:1.2.7.RELEASE") เพิ่ม library thymeleaf เข้าไปใน project เป็น view engine หลักที่ทำให้เราสร้าง dynamic HTML ได้
compile('net.sourceforge.nekohtml:nekohtml:1.9.22') เพิ่ม library nekohtml เข้าไป เพื่อช่วยให้ tag HTML บาง tag ที่ browser แสดงได้ถูกต้องแต่ความ strict ของ thymeleaf จะส่ง error ออกมาหากไม่มี lib ตัวนี้ช่วย มีประโยชน์มาก เมื่อนำ theme สำเร็จรูปมาใช้ แล้ว front end developer อาจจะใส่ tag บางอย่างที่เป็น HTML แบบเดิม ไม่ HTML 5 style tag 100%
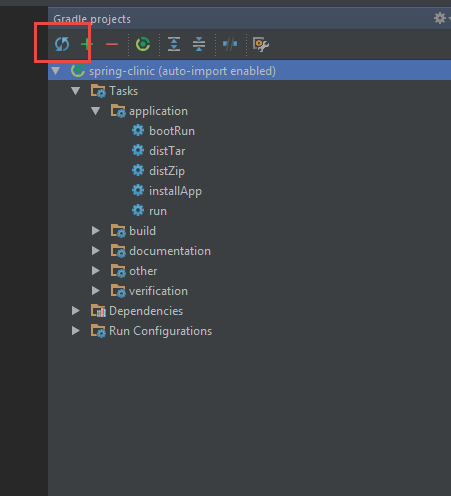
**เสร็จแล้วอย่าลืม update gradle ที่ปุ่ม update gradle window กันด้วยนะครับ **
ให้เราเพิ่ม application.properties เข้าไปใน folder src/main/resources เพิ่มคำส่งต่อไปนี้เข้าไป
application.properties
spring.thymeleaf.mode=LEGACYHTML5
spring.thymeleaf.cache=false
- spring.thymeleaf.mode=LEGACYHTML5 เป็น config ให้ thymeleaf support tag แบบเดิมที่ไม่ใช่ style HTML5 ด้วย
- spring.thymeleaf.cache=false เปิดการปิด cache ของ thymeleaf เหมาะในช่วง development เพราะเราจะต้องแก้ไข file เสมอ
application.properties เป็น file สำหรับเก็บ config ต่างๆ ของ spring application ครับ
สร้าง template file
template file ก็คือ file html ที่มีคำสั่งพิเศษของ Thymeleaf อยู่ด้วย
ให้เราสร้าง folder templates ใน folder src/main/resources/templates
จากนั้นให้เพิ่ม HTML file ชื่อว่า index.html ดังนี้
<!DOCTYPE html>
<html lang="en">
<head>
    <meta charset="UTF-8">
    <title>index</title>
</head>
<body>
<h1>
index page
</h1>
</body>
</html>
ส่งเกตว่า file index.html เป็นเพียง file HTML5 ธรรมดาเท่านั้นเอง
ข้อดีของ thymeleaf คือ design มาให้เราเปิดแบบ static ได้เลย ไม่ต้องผ่าน web server ก็ได้ ข้อดูสำหรับ design ครับ เขาสามารถเปิดด้วย browser แล้วดูผลลัพธ์ได้เลย แบบเปิด file ธรรมดาได้เลย
##เรียกใช้ template file ใน controller class
แก้ไข file HomeController.java เป็นดังนี้ครับ
package com.codesanook.springclinic;

import org.springframework.boot.SpringApplication;
import org.springframework.boot.autoconfigure.EnableAutoConfiguration;
import org.springframework.stereotype.Controller;
import org.springframework.web.bind.annotation.RequestMapping;
import org.springframework.web.bind.annotation.ResponseBody;

@Controller
@EnableAutoConfiguration
public class HomeController {

    @RequestMapping("/")
    String home() {
        return "index";
    }


    public static void main(String[] args) throws Exception {
        SpringApplication.run(HomeController.class, args);
    }

}
อธิบายคำสั่ง บรรทัดที่ 16 เรา return string index ออกไป นี่คือการ return ชื่อของ template ออกไปครับ ซึ่งก็คือ index.html นั่นเอง แต่เราไม่ต้องใส่ .html เข้าไป ใส่แค่ชื่อครับ
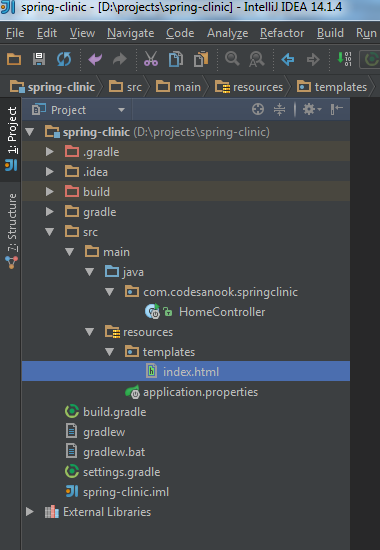
รูปแสดงโครงสร้างของ project ตอนนี้
ทดลอง run Spring boot ด้วยคำสั่ง bootRun ที่ gradle window กันเลย
ผลลัพธ์ที่ browser

บทความครั้งต่อไปจะ fancy ขึ้น เราจะทำให้ view ของเรา dynamic มากขึ้นครับ
ขอบคุณครับ
มีคำถามฝากไว้ได้เลยนะครับ